If you’ve ever watched a craftsperson pull a vivid, glass-like enamel finish onto metal jewelry, cookware, or decorative hardware and wondered, “How do they control that heat so precisely without ruining the entire piece?” the answer is often a reliable butane gas torch. As a supplier of butane gas torches for enamel work, I’ve spent thousands of hours watching new enamellers make the same mistake: grabbing a generic torch from the hardware store and burning through their first batch of copper or steel blanks before they even learn to regulate heat. Enameling isn’t just about turning a torch on and holding it near metal—it’s about matching your torch’s performance to the specific needs of enamel powder, metal gauge, and the finish you want. Over the past five years, I’ve walked hundreds of enamellers through their first successful enamel project, and today I’m breaking down every step to make that process easy, safe, and consistent. Butane Gas Torch
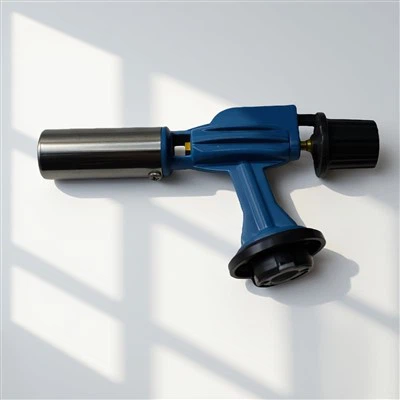
First, let’s talk about why butane torches are the gold standard for hobby and small-scale enameling, rather than larger propane torches or kilns. Kilns are ideal for high-volume or professional work, but they take up space, cost hundreds of dollars upfront, and require consistent power access—something many home enamellers don’t have. Propane torches put out too much heat too quickly, leading to hot spots, warped metal, or enamel that bubbles and cracks before it has a chance to fuse. Butane torches, on the other hand, operate at a lower, more controllable temperature (around 2,500°F, which is exactly the sweet spot for most vitreous and porcelain enamels), are portable, and have adjustable flames that let you dial in heat for every small, detailed enamel project. The key is that not all butane torches are created equal for this work. I always recommend looking for models with a flame regulator, a stable base to avoid tipping, and a long enough nozzle to keep your hands a safe distance from the hot metal. Cheap disposable butane lighters might work for melting candle wax, but they don’t provide the consistent, adjustable heat enameling requires.
Before you even light your torch, there are a few non-negotiable prep steps that will save you from frustration and injury later. First, set up a dedicated workspace. Enameling involves powder that can be messy, hot metal that stays scalding for minutes, and open flames, so you need a flat, non-flammable surface. I recommend a thick ceramic tile or a metal workbench with a fire-resistant mat underneath—nothing wooden or plastic, even if you think you’re being careful. Next, gather your materials: your metal blanks (pick 20-gauge copper for beginners—it’s soft, easy to manipulate, and forgiving of small mistakes), vitreous enamel powder (avoid liquid enamels for your first project, as they can be inconsistent for new learners), a set of small brushes to sift powder onto metal, a pair of heat-resistant tweezers, and a small fire extinguisher or a bucket of sand nearby, just in case. Most importantly, check your torch: make sure it’s filled with butane (we recommend high-quality, refined butane from reputable brands—cheap butane has impurities that clog regulators and cause uneven flames), and test the flow by lighting it and adjusting the flame to a sharp, blue cone. If your flame is mostly yellow and wobbly, turn the regulator until it’s bright blue—yellow flames mean incomplete combustion, which leaves soot on your metal and causes enamel to discolor.
Now, the core process: how to use the torch to apply and fuse enamel, step by step, with tips I’ve learned from every new enameller who’s come to me for help. First, prep your metal blanks. Even if they look smooth, they have a thin layer of oil, dirt, or oxidation from manufacturing that will prevent enamel from sticking. Use steel wool or a fine-grit sandpaper to buff the surface of your blanks until they’re bright and shiny, then wipe them down with rubbing alcohol to remove any leftover dust. For copper blanks, many enamellers also do a quick “firing” before applying enamel: hold the torch 2 to 3 inches away from the metal, moving in a circular motion, until the surface turns a faint, dull brown (this is called a “bloom”). That oxidation layer helps the enamel adhere, so don’t skip this step.
Next, apply your enamel powder. The easiest way for beginners is to use the “wet application” method: mix a small amount of enamel powder with a drop of distilled water to make a thick, paste-like consistency, then use your brush to spread an even, thin layer over your metal. This avoids the mess of loose powder blowing away when the torch is on, and it lets you build up layers gradually. If you prefer the dry method, place your metal blank on the work surface, and gently tap the container of enamel powder over the metal until the entire surface is covered in a thin, even layer—shake off any excess powder that doesn’t stick, and blow lightly (with your mouth, not the torch) to remove loose particles. Either method works, but I recommend wet application for your first three projects to avoid uneven coverage.
Now, the part everyone gets wrong: heating the metal and fusing the enamel. Hold your torch at a 45-degree angle, about 2 to 3 inches away from the metal, and keep the flame moving in slow, circular motions—never hold the flame in one spot, even for a second. The goal is to heat the entire metal blank evenly, not to blast a single point with heat. As the metal warms up, you’ll notice the enamel starting to melt: it will turn glossy and smooth, and any bubbles on the surface will pop. This is the point you’re working toward. New enamellers often rush this step, moving the torch too fast or holding it too close, which means the outside of the enamel melts before the inside, leading to craters or bubbling. A good rule of thumb: take 30 to 45 seconds to heat a 1-inch metal blank, 1 to 1.5 minutes for a 2-inch blank. If you see the metal starting to warp, you’re heating it too fast—pull the torch back a little and slow down your motions.
Once the entire enamel layer is glossy and smooth, turn off your torch, and carefully move the hot metal to a heat-resistant surface (I use a metal trivet for this) using tweezers. Let the piece cool completely at room temperature—never quench it in water, as the rapid temperature change will cause the enamel to crack or pop off the metal. If you want a second layer of enamel for more depth, wait until the piece is fully cool, repeat the application and heating process.
Over the years, I’ve seen even experienced enamellers run into common mistakes, so here are the fixes I share with every customer who buys a torch from us. First, soot on enamel: this happens when the flame is too yellow (as we talked about earlier) or the torch is too close to the metal. If you notice black soot after heating, let the piece cool, then gently scrub it with a soft toothbrush and warm, soapy water. Next, bubbling: this is usually from trapped moisture in the enamel powder, or heating the metal too quickly. Make sure your enamel powder is completely dry (store it in an airtight container, not a bag), and take your time heating. Warped metal: this happens when one side of the metal is hotter than the other. If you’re working with small blanks, hold them with tweezers while heating so you can rotate them evenly, or place them on a metal mesh stand so heat is evenly distributed from underneath. Finally, inconsistent color: this is often from low-quality butane or a dirty torch head. Once a month, take a small piece of wire and gently clean the torch’s nozzle to remove any built-up debris, and always use high-quality butane to keep your flame stable.
One of the best parts of working with butane torches for enameling is that they’re versatile, too. You don’t have to stick to basic flat blanks—many of our customers use their torches to enamel jewelry settings, decorative metal plates, even small metal tiles for backsplashes. For smaller details, like a line of colored enamel or a design, you can adjust your torch’s flame to a smaller, more precise cone: turn the regulator down slightly, and the flame will narrow, letting you apply heat only to specific spots. For larger pieces, you can expand the flame to a soft, wide cone to heat bigger surfaces evenly. The adjustability is why I recommend our torches over entry-level models that only have one flame setting—being able to tweak your heat for different projects makes the difference between a finished piece you’re proud of and one you have to toss.
Safety is non-negotiable, and I never skip sharing these rules with anyone who uses our torches. Always work in a well-ventilated space—enamel fumes, while not toxic in small amounts, can be irritating if you’re working in a closed room. Never leave a lit torch unattended, even for a second. Keep your hair tied back, and wear long sleeves that fit tightly—loose fabric can catch fire if it comes near the flame. And always let your torch cool completely before storing it—never put a hot torch in a bag or case, as remaining butane can build up and cause a hazard. If you’re a complete beginner, I also recommend practicing on scrap metal blanks first before working on your final project—you’ll make mistakes, and it’s way less frustrating to ruin a $0.50 scrap than a $5 jewelry blank.

If you’re ready to start your own enamel projects, or if you’re upgrading your current torch for more precise work, our team is here to help you find the right model for your needs. Every torch we sell is tested for consistent flame control, durability, and safety, so you can focus on creating beautiful enamel finishes instead of troubleshooting your equipment. Whether you’re a hobbyist making jewelry for friends, a small business owner selling enameled decor, or a beginner just learning the basics, we can guide you to the right torch, answer questions about heat settings, and share tips to make your projects a success. Don’t let frustration with uneven heat or inconsistent finishes hold you back—reach out today to discuss your needs, and we’ll help you pick the perfect torch for your enamel work.
Gas Torch References:
- Enamel Arts Foundation. (2021). The Beginner’s Guide to Torch Enameling. Los Angeles, CA: Enamel Arts Foundation.
- Smith, J. (2019). Precision Heat: Selecting and Using Fuel Torches for Small-Scale Metalworking. Craft Industry Press.
- Occupational Safety and Health Administration. (2020). Safety Guidelines for Hot Work in Small Craft Workspaces. U.S. Department of Labor.
- White, L. (2022). Vitreous Enamel Basics: Adhesion, Firing Temperature, and Common Defects. Journal of Modern Craft, 15(2), 112-127.
Yuhuan Shunshida Intelligent Electromechanical Co., Ltd.
As one of the most professional bayonet spray gun manufacturers and suppliers in China, we’re featured by quality products and good service. Please rest assured to buy durable bayonet spray gun at low price from our factory. We also accept customized orders.
Address: No. 186 East Nanxing Road, Chumen Town, Yuhuan City, Zhejiang Province
E-mail: yuhuanshunshida@gmail.com
WebSite: https://www.cmssdgastorch.com/
